03 November, 2011

Mini Gift Buckets with Pennants - Tutorial

I was super excited when I found online (with the help of my little sister) these super cute little tin buckets. They are only about 10cm tall... so cute!! :) As soon as I saw them I knew they'd be perfect for little gifts at Adele's party. So, here's what I did with them...

The theme for Adele's party was pinwheels and pennants so I decided to add some pennants to the buckets.
 Ok, If you want to make some or make something similar then here's a quick tutorial...

Supplies...

- Buckets or similar
- scrap fabric
- craft glue
- disposable lid to put glue on
- white card stock (I used Stampin' Up, whisper white)
- alphabet stamps (I used a Stampin' Up set)
- ink (I used Stampin' Up, Crumb Cake)
- linen thread
- scissors
- hole punch

Supplies
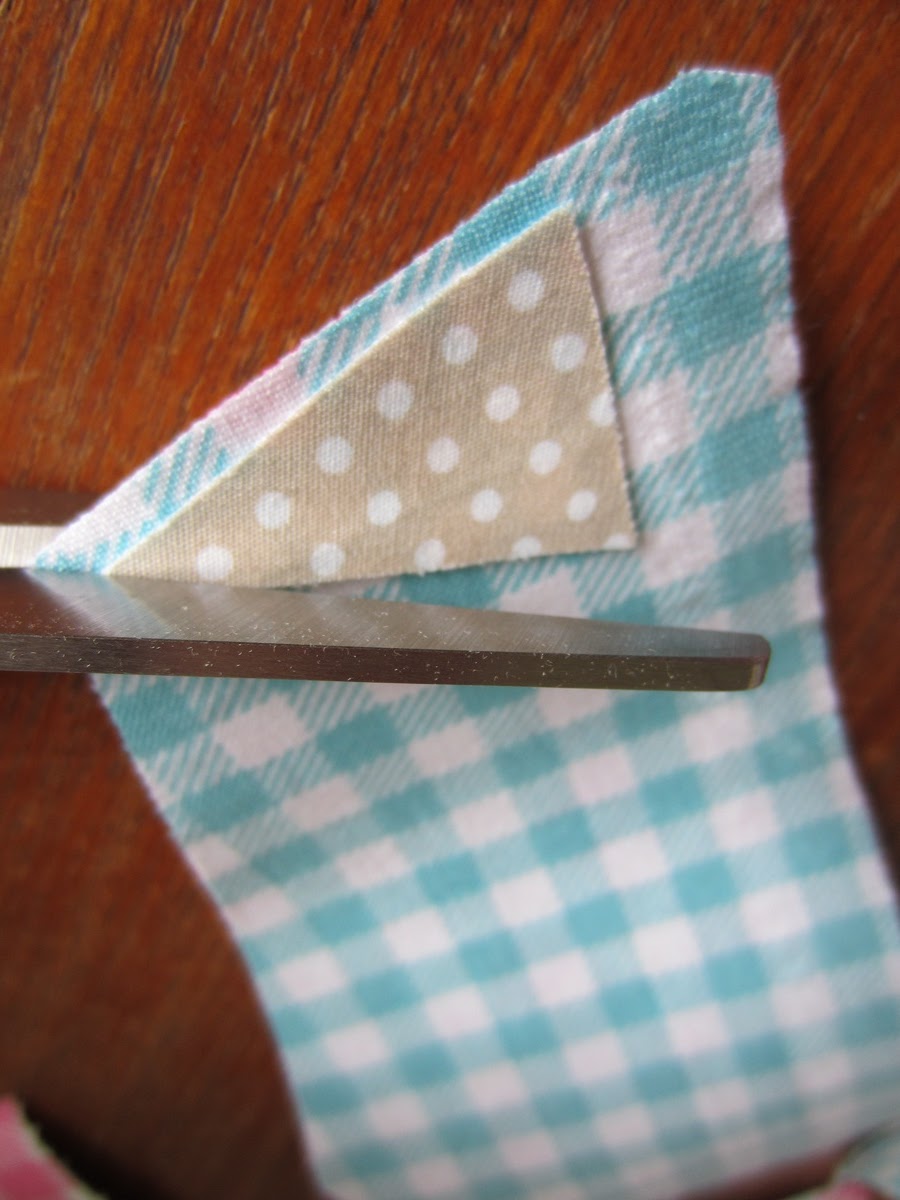
Step 1 - cut out a pennant template and then cut multiple pennants using your fabric scraps. I used 6 pennants per bucket.


 Step 2 - Dip the end of the pennant into the craft glue and slide it under the gap in the top of the bucket.


Step 3 - Now it's time for the tags. Get out your cardstock, ink and stamps. Stamp the name of the recipient onto the cardstock.


Step 4 - Cut around the name leaving room at the end to punch a hole. Now run the edges of the tag through the ink pad. This gives the tag a little extra definition especially if you're using white cardstock on a white bucket like i am.


Step 5 - Punch a hole in the end of your tags.


 Step 6 - Use the linen thread (or similar) to tie the tag to the bucket. You can use a glue dot to secure the bottom edge to the bucket if you don't want the tag swinging around.

TADA!!!

I filled my buckets with chocolates in cellophane bags. :) They were a real hit with the ladies. The men just got the chocolates. I knew they wouldn't appreciate the buckets (and they were a bit girly anyway).

ok, happy creating!!

Kerryn

02 November, 2011

Wedding Chair Cover... only miniature!!!

I just had to share this little project with you, I am so happy with the result! My sister is doing an assessment at the moment that requires her to setup a wedding themed display. The main part of the display will be the flowers. She wanted to be able to display her flowers on a miniature round wedding table, so my brother went to work making her a little table. At the same time he also made her a matching miniature chair... what could be cuter?!?!? Anyway, he contacted me and asked me to make a table cloth and wedding style chair cover for our sisters display. "How exciting", I thought... "yes, I'll do my best!!"

It took 2 attempts to make and was pretty easy to do once I worked out the measurements and best sequence of steps to take. The most important part was taking really accurate measurements. I wanted it to fit really well.

Ok, so here it is...

Oh so cute!!
Here it is with a spool of thread for perspective. It's pretty tiny!!

Without the ribbon tie


Isn't my brother clever!!
I'm going to get some pics of the table and the whole display to show you. I can't wait to see it all together. :)

That's all for today...

Kerryn

31 October, 2011

Gifts gifts gifts... handbag for a special friend

I went away this last weekend with a group of lovely ladies. After the week I'd had it was a very welcome getaway. We celebrated the birthday of a friend who is becoming quite dear. She is quite precious and needed a special gift to match.

Here's her gift...

The fabric is a really thick weave linen. It's totally gorgeous!!
This is the lining fabric


So... happy birthday Faff!! You're one in a trillion!! Love you!! :)

Kerryn

26 October, 2011

helium balloons and felt teeth and ice packs... oh my!!

Today's 'just because' gift is one that makes me giggle. My brother has just had some of his wisdom teeth removed, poor guy!! I absolutely HATE the dentist (sorry to any dentists reading this, I'm sure you really are nice people... ;). My brother has been dreading these few appointments so I thought I'd make something special for him to come home to. My brother has a terribly funny sense of humour so I was really able to go all out on his gift. I decided to make him a cover for a ice pack with felt teeth and blood drops dripping off one of the roots of the teeth. Hee hee hee...

Here it is...

I've put some snaps on the end so that the cover can be removed
Sorry to my mother-in-law and all you expert embroiderers out there. I've only had one lesson in embroidery and I couldn't be bothered doing it properly... so... it's a bit 'rustic' ;)
with the ice pack
I also bought him a set of replacement teeth

Here it is on his doorstep with a helium balloon chosen by Lachie. This is actually the second balloon that we bought. The first one got popped 15 minutes after we got home from a very stressful trip to the balloon shop. And yep... I cried!! Not sure if it's better or worse to cry over a popped balloon as opposed to spilt milk?!?!? Hmmm... lots of child related stress at our place at the moment. Anyway, blah blah blah...
Ok, hope you like this random little project. Know someone who needs to be cheered up?? Why not go out and buy a helium balloon?? I am a firm believer that anyone can be cheered up with a helium balloon. ;) Who cares their (or your) age... you're never too old for a helium balloon!!

See ya,

Kerryn

24 October, 2011

Gifts and bows...

After Adele's party I had a massive, unexpected, creative slump... but now I'm back into it again. Hoorah! I'm super excited to have made some progress into a few more of my Christmas gifts. Hoorah again! I've also been taking some time out to make gifts for people who need a bit of extra love. As i've mentioned before, I am so passionate about gift making and gift giving. One step better... making a gift for someone for no reason other than to let them know that they are loved, valued, precious and always in my thoughts and prayers. :) So this week i'll be making a few gifts... 'just because'. :)

The first gift i've made is a fabric covered art journal. I'd never done one before and am happy with the way it ended up. I took the whole book apart to cover it and then put it back together again. If you're keen for a tutorial then let me know and i'll see if I can get one together. :)

Anyway... here are some pics...

The purple fabric in real life is an awesome electric purple colour. It looks really drained of colour here. It's actually quite vibrant and delicious!! ;)


This is the opening page. The book is a little bigger than A4 so the lettering is quite large. I cut the lettering out with my big shot die cutting system. 'Hope' is in purple.

As mentioned last post I have made a little brooch to pin to Adele's new dress. I used one of the straps from my bargain top to make it and hot glued it onto a brooch back. So cute!

Here it is on the dress.
Ok, that's all for now! How about sending a card or gift to someone special today?? :)

Kerryn

21 October, 2011

A dress for Adele... 2 weeks late... :)

Well I've spent a lovely day sewing!! I love how creating gives you a chance to grab hold of a bit of joy and claw yourself back into the land of 'Happy'. :)

Today I made the dress that I wanted to make for Adele to wear to her party. 2 weeks late... as Lachie would say... "not to worry".

I am so in love with the fabric! It's part of Sarah Jane's, Children at Play range. Isn't it gorgeous!!!!!


I bought this top at Myer for $2!!! I saw it on the sale rack and couldn't go past it. I just knew it would come in handy for something. I cut the bottom off for the base of her dress. I also reused a few of the buttons for the back of her dress. There's still stacks left so lets see what else it comes in handy for... :)

See!! From $35 down to $2!!! Score!! :)

I LOVE the cute little buttons. :)

Isn't the fabric just divine!! :)
I am planning on making a little brooch to add to the top section of the dress for a little bit of extra colour and maybe a little bit of hair embellishment-y goodness... Hmmm... we'll see... :)

Ok, till next time...

Kerryn

14 October, 2011

Tutorial - Pinwheel and glass bottle decorations

Ok, as I mentioned in my last post, I used stacks of pinwheels for Adele's 1st party. If you missed my tutorial on how to make a basic fabric pinwheel then just click here.

Here is one way that I used my stash of pinwheels...

I used these babies as table decorations. Read on to find out how... :)
Supplies...

Pre-made pinwheels
bamboo skewers or wooden dowel
spray paint
polystyrene board
hot glue gun
variety of glass bottles
fabric scraps
sand

Ok... lets go...

Step 1 - stick your bamboo skewers or wooden dowel into the polystyrene board and spray paint. You'll probably need a few coats. Better to do lots of light coats than have one gluggy coat with lots of runs going down the skewer. :)


Step 2 - choose your bottles. I used  maple syrup bottle, Vietnamese dipping sauce bottle & boiled lollie bottles. Remove labels and any sticky residue. I used tea tree oil. Clean the bottles up and give them a spray paint.


Step 3 - tie some scrap fabric round the top to cover the screw top thread. This makes the bottle look less 'homemade'.


Step 4 - use your hot glue gun to glue the bamboo skewers to the back of your pinwheels.


 Step 5 - fill your bottles with sand and poke in your skewers with pinwheels...

Tada...


See you next time for my next pinwheel tutorial... :)

Kerryn