30 November, 2011

Lachie's first Christmas tree

My precious Lachie is 3.5 and is now old enough to have a Christmas tree without destroying it. Unfortunately Adele is too young so we are not putting up a big Christmas tree this year. We didn't want Lachie to miss out though, so we went out last Saturday and bought him a super cheap small tree to put on top of his toy cupboard in his room. He was super excited to decorate it because we had been making our own decorations the week before. So... here it is...

Lachie's very first Christmas tree. :) I absolutely love it! It's jam packed full of special stuff that he has made and chosen. LOVE my boy! :)
These are pipe cleaner and bead wreaths... super easy to make.

Laminated Christmas trees 'decorated' with paper baubles. :)

laminated stars. Tip: before laminating write your child's name and the year on the back so that you have a record in years to come of which child made the ornament and how old they were. :)
We let Lachie choose a few decorations from Kmart. He chose these cute little mushroom ornaments. :)

He also chose this super fantastic tinsel!!
Lachie and Tim decorating the tree

Look at the concentration on his face. :)
I wanted lachie to make a star for the top of the tree. So I bought a gorgeous cardboard star ornament from a craft store for him to paint...

Then he added some star sequins on one side and some cut up tinsel (I didn't have any glitter so cut up tinsel was my best option ;) on the other side. I cut off the cord and poked a hole in the bottom so that I could stick some wire into the star. I used a wire coat hanger...

... I left a straight section that was long enough to go from my hole all the way to the top of the star and then used two pairs of pliers to bend the wire into a spiral.

Tada!! A little 'rustic' but it serves our purpose perfectly!

And here it is!! :)

And the reverse side. :)
 I am so loving sharing the joy of Christmas with Lachie this year. We've got stacks more ornaments to make, I'll post some pics when they're done. :)

Ok, that's all for today...

Kerryn

24 November, 2011

Handmake Christmas 2011 - fingerprint cufflinks

Hi!! I love making gifts for people with my kids. I would love to teach them the art of gift making and gift giving. So each birthday/Mother's day/Father's Day/Christmas we get stuck in to the gift making. Yesterday we made some little fingerprint discs out of polymer clay (PC or fimo here in Australia). I had been planning on making these for a while and attaching them to some cuff link bases that I had bought from Etsy. Well they arrived and so we pulled out the PC and got going. I took a few photos of the process so thought I'd write a quick tutorial in case you'd like to make them with your kids. :) The kids will be giving them to some of the special men in their lives as little Christmas gifts. :)

So... here they are...


So, start by mixing your favourite colour polymer clay (PC) with some white. In the past I have found that if you do not mix it with white then it cracks and loses definition when you bake it. Perhaps that's just that brand I use??? Anyway, I always mix my coloured PC with white. It's pretty tough to start off with, so it'll take some time to make it malleable. When I'm making multiple finger pint discs I start off with a large ball of PC and divide into even portions so that all the discs are the same colour.


Once you've completely mixed the colours together divide evenly into the number of discs you need and roll them into balls.


Now place the balls in between 2 layers of baking paper and use a book to press flat. Using the baking paper and book make sure the disc is even and smooth with none of your fingerprints all over it.
Next step is to get your little one's finger and firmly press it into the PC disc. You will need to use a bit of pressure as the PC is still quite firm.


Now get out your cake skewer and etch your child's name into the PC along with the year. Don't be too picky... the etching can look a bit 'rustic' ;). Next pop them in the oven for the time mentioned on your PC pack. Mine is 130 deg Celsius for 30min.


Now get out you cuff link bases and hot glue gun.


I found the best way was to glue directly onto the back of the disc and then quickly attach it to the cuff link base.


TADA...


Such a cute little gift. Yes the etching is a little rustic but hey... I think they're cute. :)


Have fun!

Kerryn

15 November, 2011

Special gift for a special baby

I am excited to say that I have, for the very first time, dabbled in quilting!! And, I loved it!!! I made a little floor rug/baby blanket for a precious little girl born to a friend of mine in my Mother's Group. Now, I didn't do any fabric piecing, but, in my mind I used a number of 'quilting' type techniques... so... I'm calling it a quilt. :)

Here it is...
I used this tutorial for the binding. I really enjoyed hand sewing the binding, it was quite therapeutic. :)

I wish I'd given the quilt a good iron before taking this pic. I've quilted little hearts all over the quilt. It took FOREVER!! I cut out paper hearts and placed them on the quilt then drew around them all with fabric marker and then machine quilted with a regular machine foot. I don't have a free motion foot (is that what it's called??).

Close up of the hearts


The backing was a really fine corduroy. Totally gorgeous. :)
So, for all you amazing quilters out there... please be kind!! I'm super happy with it! My friend loved it to... Yay!! :)

Ok... till next time...

K

14 November, 2011

Gift - Butterfly Cushion Cover

I have a bit of a theory about taking gifts from the idea phase to the making phase. You've got to wait for the idea to go from your head to your heart. I know that might sound a little corny but, as someone who gets carried away with a gazillion gift ideas, I need a way to cull my ideas. As a Christian I also believe that Jesus knows who needs some extra love and so I place my ideas in his hands and wait for him to place them back in my heart. Only then do I run to my fabric, thread and machine and get going. :) I find that when I wait on Him the gifts I make really touch the people who receive them.

Anyway... blah blah blah...

Yesterday I was able to give a gift to a special friend. I was super excited about it!! So, here it is...


Felt butterfly cushion cover. In real life the fabric is much richer and deeper and more delicious. ;)

The butterflies were cut out using my Big shot die cutting machine. :)

I love a good fabric covered button

some of the felt was glittery... which was perfect for my friend. :)

I love to take a bit of extra effort when I gift wrap.

So, that's it!!

Kerryn

08 November, 2011

A dress... for me!

Last Sunday we had some family photos done with all of Tim's side of the family. Our dress colour scheme for the photos was blue/pink/purple/neutrals. I bought a really gorgeous blue top from portmans but when I got it home I realised that it didn't sit very well with my jeans (yes, I had kids with me and I bought it in a massive rush). So... I decided to make it into a dress...

I had a dress that I bought last year that I loved but didn't wear a lot because the top buttons always popped open (no, it wasn't too small ;) I had previously cut the skirt part out of the dress and put some pleats in the top so that it fit me around the waist.

the original dress... can you tell that I hate ironing??
Below is a pic of the skirt and the top from Portmans. Sorry for the crap pic. :)


Here's the completed dress... :)


I wore it with a belt around the waist. I would show you a photo with me in it but when I looked at the pic Tim took I couldn't put it up... exercise and diet coming my way!

 Ok... that's all...

K

03 November, 2011

Mini Gift Buckets with Pennants - Tutorial

I was super excited when I found online (with the help of my little sister) these super cute little tin buckets. They are only about 10cm tall... so cute!! :) As soon as I saw them I knew they'd be perfect for little gifts at Adele's party. So, here's what I did with them...

The theme for Adele's party was pinwheels and pennants so I decided to add some pennants to the buckets.
 Ok, If you want to make some or make something similar then here's a quick tutorial...

Supplies...

- Buckets or similar
- scrap fabric
- craft glue
- disposable lid to put glue on
- white card stock (I used Stampin' Up, whisper white)
- alphabet stamps (I used a Stampin' Up set)
- ink (I used Stampin' Up, Crumb Cake)
- linen thread
- scissors
- hole punch

Supplies
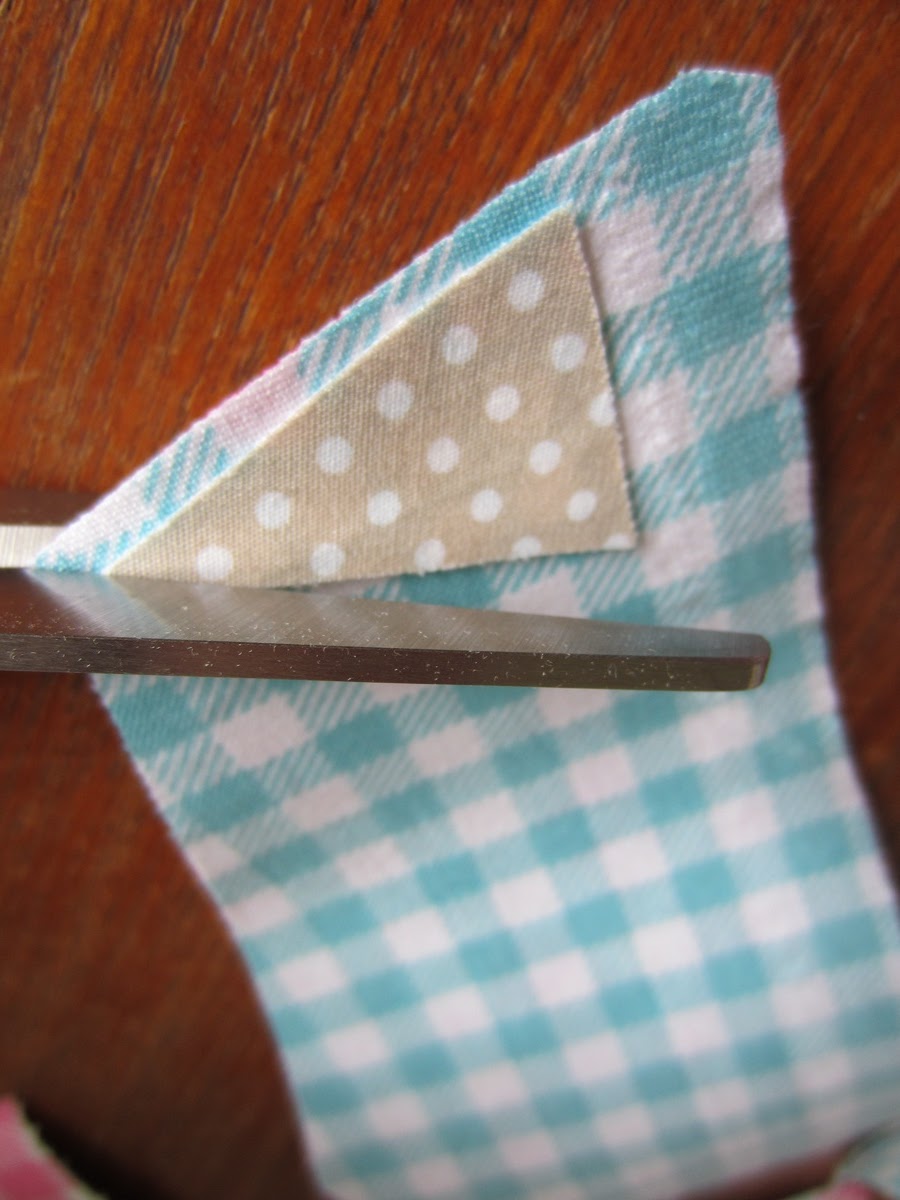
Step 1 - cut out a pennant template and then cut multiple pennants using your fabric scraps. I used 6 pennants per bucket.


 Step 2 - Dip the end of the pennant into the craft glue and slide it under the gap in the top of the bucket.


Step 3 - Now it's time for the tags. Get out your cardstock, ink and stamps. Stamp the name of the recipient onto the cardstock.


Step 4 - Cut around the name leaving room at the end to punch a hole. Now run the edges of the tag through the ink pad. This gives the tag a little extra definition especially if you're using white cardstock on a white bucket like i am.


Step 5 - Punch a hole in the end of your tags.


 Step 6 - Use the linen thread (or similar) to tie the tag to the bucket. You can use a glue dot to secure the bottom edge to the bucket if you don't want the tag swinging around.

TADA!!!

I filled my buckets with chocolates in cellophane bags. :) They were a real hit with the ladies. The men just got the chocolates. I knew they wouldn't appreciate the buckets (and they were a bit girly anyway).

ok, happy creating!!

Kerryn

02 November, 2011

Wedding Chair Cover... only miniature!!!

I just had to share this little project with you, I am so happy with the result! My sister is doing an assessment at the moment that requires her to setup a wedding themed display. The main part of the display will be the flowers. She wanted to be able to display her flowers on a miniature round wedding table, so my brother went to work making her a little table. At the same time he also made her a matching miniature chair... what could be cuter?!?!? Anyway, he contacted me and asked me to make a table cloth and wedding style chair cover for our sisters display. "How exciting", I thought... "yes, I'll do my best!!"

It took 2 attempts to make and was pretty easy to do once I worked out the measurements and best sequence of steps to take. The most important part was taking really accurate measurements. I wanted it to fit really well.

Ok, so here it is...

Oh so cute!!
Here it is with a spool of thread for perspective. It's pretty tiny!!

Without the ribbon tie


Isn't my brother clever!!
I'm going to get some pics of the table and the whole display to show you. I can't wait to see it all together. :)

That's all for today...

Kerryn