Showing posts with label craft. Show all posts

10 January, 2012

Things that make me happy...

Sometimes life is less than ideal... we are in a 'less than ideal' patch at the moment. BUT... there are still so many thing that make me smile!! This post is dedicated to all the wonderful things in life that have made me smile over the last few days....

So, in no particular order, here they are...


This very handsome man. :)

A precious sleeping Lachie

A very cheeky Adele having fun with hair accessories ;)

Unexpected flowers delivered by a friend. Thanks Jmack. :)

My new loves... resin flowers and jewellery findings... I have LOTS of plans for these babies...

Here are a few simple things I've made for myself with the resin flowers. Soooooo pretty.... :)

My new love.... Tim suprised me with this recently. I have been wanting, needing, desiring, dreaming about... ok just plain coveting this for ages!! My man got it for me!!!! Ahhhhhhhhh!!!!! I'm loving getting to know her and working out how she works. She's so lovely! She's not named yet... I'm open to suggestions. ;)

Last but NOT least, I am super happy to finally be able to put up a photo of me in this dress. After losing some of the dreaded  chocolate baby weight, I am now happy to show you this dress with me in it!! :) Here's the original post with all the details of the dress. :) Yay for losing weight and feeling better! ;)
Ok... that's all...

I hope this post has inspired you to look for the things that make you smile! Writing this has inspired me to search for the good things again today. :) :) :)

Kerryn

03 November, 2011

Mini Gift Buckets with Pennants - Tutorial

I was super excited when I found online (with the help of my little sister) these super cute little tin buckets. They are only about 10cm tall... so cute!! :) As soon as I saw them I knew they'd be perfect for little gifts at Adele's party. So, here's what I did with them...

The theme for Adele's party was pinwheels and pennants so I decided to add some pennants to the buckets.
 Ok, If you want to make some or make something similar then here's a quick tutorial...

Supplies...

- Buckets or similar
- scrap fabric
- craft glue
- disposable lid to put glue on
- white card stock (I used Stampin' Up, whisper white)
- alphabet stamps (I used a Stampin' Up set)
- ink (I used Stampin' Up, Crumb Cake)
- linen thread
- scissors
- hole punch

Supplies
Step 1 - cut out a pennant template and then cut multiple pennants using your fabric scraps. I used 6 pennants per bucket.


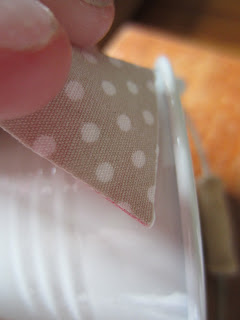
 Step 2 - Dip the end of the pennant into the craft glue and slide it under the gap in the top of the bucket.


Step 3 - Now it's time for the tags. Get out your cardstock, ink and stamps. Stamp the name of the recipient onto the cardstock.


Step 4 - Cut around the name leaving room at the end to punch a hole. Now run the edges of the tag through the ink pad. This gives the tag a little extra definition especially if you're using white cardstock on a white bucket like i am.


Step 5 - Punch a hole in the end of your tags.


 Step 6 - Use the linen thread (or similar) to tie the tag to the bucket. You can use a glue dot to secure the bottom edge to the bucket if you don't want the tag swinging around.

TADA!!!

I filled my buckets with chocolates in cellophane bags. :) They were a real hit with the ladies. The men just got the chocolates. I knew they wouldn't appreciate the buckets (and they were a bit girly anyway).

ok, happy creating!!

Kerryn

14 October, 2011

Tutorial - Pinwheel and glass bottle decorations

Ok, as I mentioned in my last post, I used stacks of pinwheels for Adele's 1st party. If you missed my tutorial on how to make a basic fabric pinwheel then just click here.

Here is one way that I used my stash of pinwheels...

I used these babies as table decorations. Read on to find out how... :)
Supplies...

Pre-made pinwheels
bamboo skewers or wooden dowel
spray paint
polystyrene board
hot glue gun
variety of glass bottles
fabric scraps
sand

Ok... lets go...

Step 1 - stick your bamboo skewers or wooden dowel into the polystyrene board and spray paint. You'll probably need a few coats. Better to do lots of light coats than have one gluggy coat with lots of runs going down the skewer. :)


Step 2 - choose your bottles. I used  maple syrup bottle, Vietnamese dipping sauce bottle & boiled lollie bottles. Remove labels and any sticky residue. I used tea tree oil. Clean the bottles up and give them a spray paint.


Step 3 - tie some scrap fabric round the top to cover the screw top thread. This makes the bottle look less 'homemade'.


Step 4 - use your hot glue gun to glue the bamboo skewers to the back of your pinwheels.


 Step 5 - fill your bottles with sand and poke in your skewers with pinwheels...

Tada...


See you next time for my next pinwheel tutorial... :)

Kerryn

13 October, 2011

Tutorial - Fabric Pinwheels

Pinwheels... Is there anything more delightful?!?!? I must have made 1000 different type of pinwheels for Adele's party last weekend. I used them for the invitations, decorations, hair clips & cupcake toppers. So I thought I'd write a tutorial for a basic fabric pinwheel. This is my very first tutorial so please let me know if it's helpful. :)

So... here goes...

Supplies...

scrap fabric
fusible webbing
buttons
thread
needle
cardboard
iron
fabric scissors

My fave scraps and roll of fusible webbing
Step 1 - cut out a paper/cardboard square the size you want your pinwheel to be. I used a lot of different sizes so cutout a lot of different sized squares from 4cm by 4cm to 12cm by 12cm.


Step 2 - cutout a square of fusible webbing slightly larger than the size of the cardboard square you have chosen.


Step 3 - Fusible side down iron the webbing onto the wrong side of your fabric.


Step 4 - cut fabric out around the webbing.


Step 5 - peel paper backing off webbing. Webbing should be fully fused to the fabric.


Step 6 - Iron squares, webbing side down, onto wrong side of coordinating fabric.


Step 7 - get out your square pattern pieces and cut your squares.


Step 8 - cut 4 diagonal lines starting from each corner of the square and ending halfway to the middle (doesn't have to be too specific, so don't stress).

Step 9 - get your needle and thread out, it's time to sew. :) Tie a knot in the end of your thread and take your needle through the centre of the pinwheel. Start with one corner of the pinwheel. Take one of the points and sew it to the centre of the pinwheel.

Step 10 - Take your needle up through the centre of the pinwheel again, through the first point (this helps to anchor it down).

Step 11 - Repeat for point 2.

Step 12 - Repeat for point 3 and 4.

Step 13 - Sew your button to the centre.
Tada... a perfect pinwheel. :)

In the next few days I'm going to be putting up some more tutorials that use this basic pinwheel. So if you love these little babies and would like to use them on some sweet projects then pop back and have a look.

Here's a sneak peek...

hair clips
decorations

Pinwheel invites


Ok, I hope this helps. Happy pinwheeling... :)

Kerryn  

10 October, 2011

Sweets Adele's 1st Birthday party

Tim and I are so thankful for our two precious children and yesterday we celebrated ONE year of life with our sweet Adele. We have had some pretty average weather here in Sydney, Australia but we were blessed with a beautiful day! :)

I have been planning Adele's party for over 2 months. My theme and colours were decided when I found the most divine fabric online. I nearly fell off my chair when I saw it... DIVINE!!! It went straight into my online cart... I bought the fabric from Hawthorne Threads which is an American based website. The fabric range is Children at Play  by Sarah Jane. So lovely!! :) After finding my fabric my theme was decided... Pennants and Pinwheels!! Hoorah! As for colours... Aqua, pinks and white. nice, clean and fresh... and most importantly not super girly!

I sourced a few other 'must haves' online and the rest was... well... handmade. :)

I am planning on posting tutorials and more detailed pictures for most of the things I have made. So take a look back in the next few weeks if you're keen for more details.

Ok... here's some pics...

THE table. It turned out just like i saw it in my head! Don't you love that!! :)
With food
Pinwheels in spray painted glass bottles and spray painted frames filled with some of my favourite fabric. :) 

I bought these gorgeous tiny buckets online for gift for the women. I added the pennants to match the theme of the party and filled the buckets with chocolate. :)

The 'lemonade stand' was one of my favourite parts of the party. My Mum and I made lemonade and I bought vintage bottles and paper straws. I love the 'lemonade' bunting too!! :) The box was an ugly folk art painted pine box which I took apart, sanded back and painted. The jug actually sat inside the box but I didn't get a pic of that.
I made some cute little fondant pinwheels for the cupcakes. :)
The cake! This was my 3rd different sized bunting and by far the cutest. So tiny! :) Tim actually iced the cake. I got a bit over it and he took over. How wonderful is he!! :)

She's excited! baby LOVES cake!! :)

Happy birthday sweet one!
LOVE LOVE LOVE this sweet girl!!

I made her a little pinwheel hair clip to go with her dress that I had made earlier. I also made these hair clips for all the girls who came to the party. More pics to come. :)

Me and my family! love THESE 3 people!!

I had to add this photo! We did the cake early so that we could let her go wild and get dirty... and she did. :)
Ok... so, I'd love to hear what you think of the party. It was 2 months in the making and over in 2 hours. Haha... so worth it. :)

Pop back soon for some more detailed pics and some tutorials.

See ya...

Kerryn